Installing Passenger Enterprise + Apache on a Digital Ocean production server
for Ruby apps + Red Hat 6 / CentOS 6 (with RPM)
No Amazon Linux RPMs
Our YUM repository may not be used with Amazon Linux. Amazon Linux is too different from RHEL and CentOS. If you are on Amazon Linux, please go back to the operating system menu and select "Other / OS independent (generic installation method)".
On this page, we will install Passenger. After installing Passenger we can begin with deploying the app.
Table of contents
- Loading...
Step 1: download and install your license key
Before you can install Passenger Enterprise, you need to download and install your license key. This is a regular file that you need to copy to your production server.
Please login to the Passenger Enterprise Customer Area.
Click on the Install button in the Customer Area.

Click on the button to download the license key.
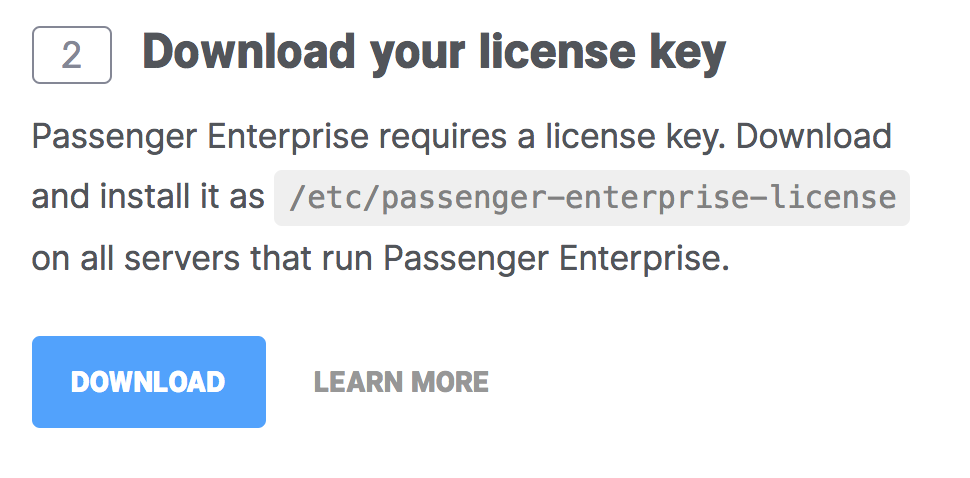
The license key will be downloaded to your local computer. Copy this license key file to your production server, for example using scp:
local-computer$ cd /path-to-your-local-computer-download-folder
local-computer$ scp passenger-enterprise-license adminuser@yourserver.com:
Replace adminuser with the name of an account with administrator privileges or sudo privileges.
Finally, login to your production server and save the file as /etc/passenger-enterprise-license:
local-computer$ ssh adminuser@yourserver.com
production-server$ sudo mv passenger-enterprise-license /etc/passenger-enterprise-license
production-server$ chmod 644 /etc/passenger-enterprise-license
production-server$ /sbin/restorecon /etc/passenger-enterprise-license # this command fixes the file's SELinux context.
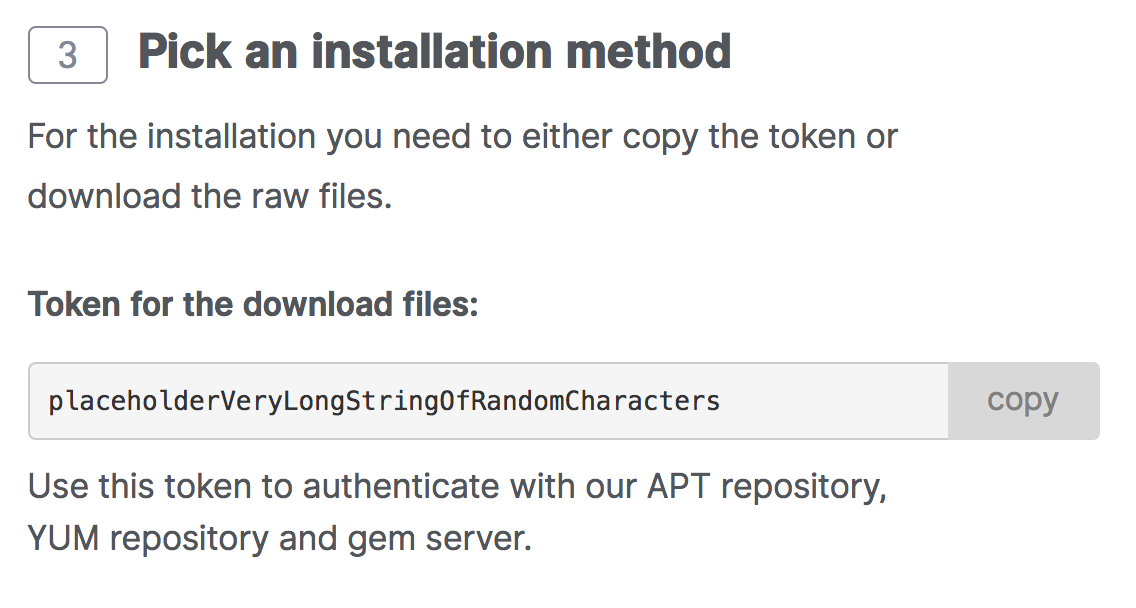
Step 2: obtain your download token
Your download token is needed in order to install Passenger Enterprise. In the Customer Area, find your download token and copy it to your clipboard.
Step 3: upgrade your kernel, or disable SELinux
You need to check on three things:
- Which Passenger version will be installed? You can check with
curl -s https://www.phusionpassenger.com/latest_stable_version.json | ruby -rjson -e 'p JSON.parse(STDIN.read)["version"]'. - Which kernel version are you running? You can find out by running
uname -r. - Is SELinux enabled? You can find out by running
grep SELINUX /etc/selinux/config. If it says "enforcing" or "permissive", then SELinux is enabled. If it says "disabled", then SELinux is disabled.
If you are installing Passenger 5.1 or later, or if your kernel version was already at least 2.6.39, or if SELinux was already disabled, then you can skip to the next step.
If SELinux is enabled, then Passenger versions prior to 5.1 require kernel >= 2.6.39. Passenger 5.1 has removed this requirement. If your kernel is not recent enough, then there are two things you can do:
-
Disable SELinux completely. Edit
/etc/selinux/config, setSELINUX=disabledand reboot. Note that merely setting SELinux to permissive mode is not sufficient.-OR-
- Upgrade your kernel to at least 2.6.39.
Step 4: enable EPEL
The instructions differ depending on whether you are on Red Hat or CentOS. The second step is only necessary on Red Hat.
| Step 1: install EPEL package |
Passenger requires EPEL.
$ sudo yum install -y epel-release yum-utils $ sudo yum-config-manager --enable epel $ sudo yum clean all && sudo yum update -y |
|
Step 2 (RHEL only): enable the 'optional' repository |
Enable the optional repository (rhel-6-server-optional-rpms). This can be done by enabling the RHEL optional subchannel for RHN-Classic. For certificate-based subscriptions see Red Hat Subscription Management Guide.
The following commands may be helpful, but are not thoroughly tested.
$ sudo subscription-manager register --username $RHN_USERNAME --password $RHN_PASSWORD $ POOL=`sudo subscription-manager list --available --all | sed '/^Pool ID:/!d;s/^.*: *//'` $ sudo subscription-manager attach --pool="$POOL" $ sudo subscription-manager repos --enable rhel-6-server-optional-rpms |
Step 5: repair potential system issues
These commands will fix common issues that prevent yum from installing Passenger
# Ensure curl and nss/openssl are sufficiently up-to-date to talk to the repo
sudo yum update -y

date
# if the output of date is wrong, please follow these instructions to install ntp
sudo yum install -y ntp
sudo chkconfig ntpd on
sudo ntpdate pool.ntp.org
sudo service ntpd start
Step 6: install Passenger packages
These commands will install Passenger Enterprise + Apache module through Phusion's YUM repository.
Replace YOUR_DOWNLOAD_TOKEN with the download token you obtained earlier.
# Install various prerequisites
sudo yum install -y pygpgme curl

# Add our el6 YUM repository
unset HISTFILE
sudo curl --fail -sSL -u download:YOUR_DOWNLOAD_TOKEN -o /etc/yum.repos.d/passenger.repo https://www.phusionpassenger.com/enterprise_yum/el-passenger-enterprise.repo
sudo chown root: /etc/yum.repos.d/passenger.repo
sudo chmod 600 /etc/yum.repos.d/passenger.repo

# Install Passenger Enterprise + Apache module
sudo yum install -y mod_passenger_enterprise || sudo yum-config-manager --enable cr && sudo yum install -y mod_passenger_enterprise
Step 7: restart Apache
Now that the Passenger Apache module is installed, restart Apache to ensure that Passenger is activated:
$ sudo service httpd restart
Step 8: check installation
After installation, please validate the install by running sudo /usr/bin/passenger-config validate-install. For example:
$ sudo /usr/bin/passenger-config validate-install
 * Checking whether this Phusion Passenger install is in PATH... ✓
 * Checking whether there are no other Phusion Passenger installations... ✓
All checks should pass. If any of the checks do not pass, please follow the suggestions on screen.
Finally, check whether Apache has started the Passenger core processes. Run sudo /usr/sbin/passenger-memory-stats. You should see Apache processes as well as Passenger processes. For example:
$ sudo /usr/sbin/passenger-memory-stats
Version: 5.0.8
Date   : 2015-05-28 08:46:20 +0200

---------- Apache processes ----------
PID    PPID   VMSize    Private  Name
--------------------------------------
3918   1      190.1 MB  0.1 MB   /usr/sbin/httpd
...

----- Passenger processes ------
PID    VMSize    Private   Name
--------------------------------
12517  83.2 MB   0.6 MB    Passenger watchdog
12520  266.0 MB  3.4 MB    Passenger core
12531  149.5 MB  1.4 MB    Passenger ust-router
...
If you do not see any Apache processes or Passenger processes, then you probably have some kind of installation problem or configuration problem. Please refer to the troubleshooting guide.
Step 9: update regularly
Apache updates, Passenger updates and system updates are delivered through the YUM package manager regularly. You should run the following command regularly to keep them up to date:
$ sudo yum update
After an update, you should restart Apache. Doing so will automatically restart Passenger too.
Next step
Now that you have installed Passenger, you are ready to deploy your Ruby application on the production server!