Deploying a Ruby app on a Heroku production server
with Passenger Enterprise in Standalone mode
Install license key
Before you can use Passenger Enterprise, you need to download and install your license key on Heroku. Please login to the Passenger Enterprise Customer Area.
Click on the button to download the license key.
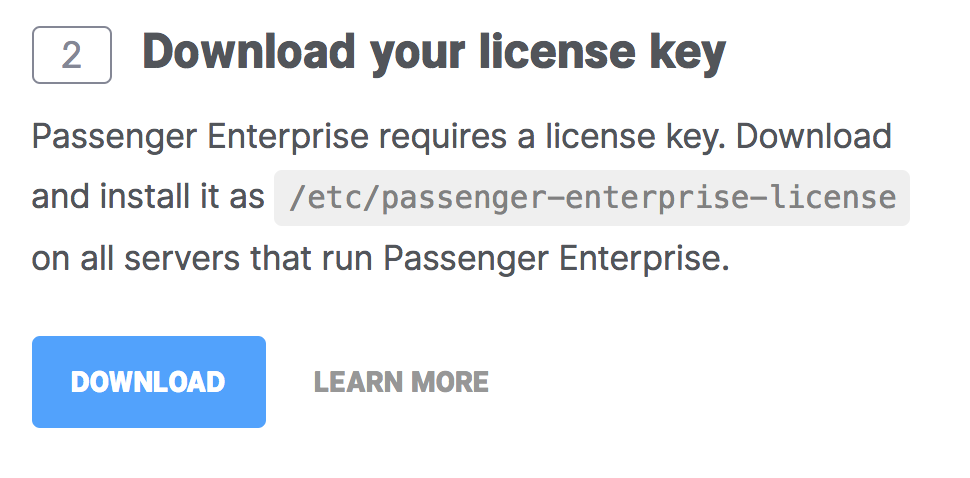
The license key will be downloaded to your local computer. Transfer the contents of the license key to a Heroku environment variable:
$ heroku config:set PASSENGER_ENTERPRISE_LICENSE_DATA="`cat ~/path-to/passenger-enterprise-license`"
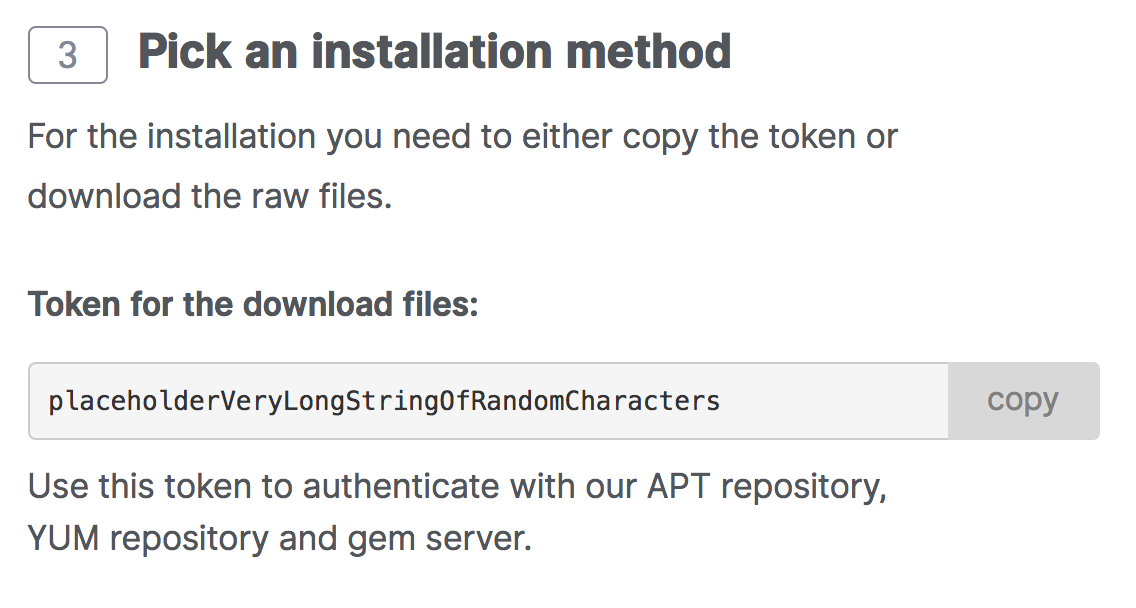
Obtain download token
You also need to obtain your download token, which you need for installing the Passenger Enterprise gem. In the Customer Area, find your download token and copy it to your clipboard.
Add "passenger-enterprise-server" to your gem bundle
Open your Gemfile. Remove lines that look like one of these:
gem "unicorn"
gem "thin"
gem "puma"
Make sure the following line exists:
source "https://download:#{your_download_token}@www.phusionpassenger.com/enterprise_gems"
gem "passenger-enterprise-server"
When you are done, install your gem bundle with:
$ bundle install
Updating your Procfile
Open your app's Procfile, or create one if you don't already have one. Remove lines that look like one of these:
web: bundle exec ruby web.rb -p $PORT
web: bundle exec unicorn -p $PORT
web: bundle exec puma -p $PORT
web: bundle exec thin start -p $PORT
Insert:
web: bundle exec passenger start -p $PORT --max-pool-size 3
Pushing the code to Heroku
Commit and deploy to Heroku:
$ git commit -a -m "Switch to Passenger"
$ git push heroku master
Next step
Congratulations, you have now deployed your app with Passenger to Heroku!
Continue: Deploying updates »