Launching a server on Amazon Web Services
On this page, we will launch an Amazon EC2 server and login to that server. If you have already launched a server, then you can skip to the next page.
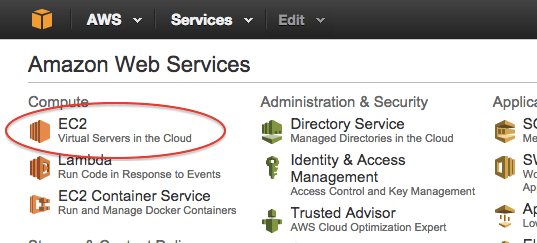
Login to your AWS Management Console and choose EC2.
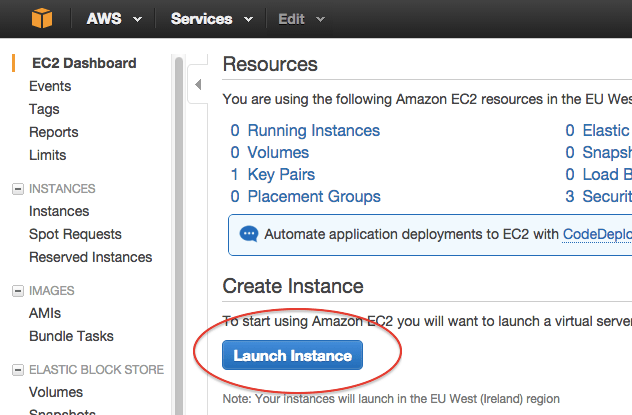
Click on Launch Instance.
You are presented with a wizard in which you can select a machine image (AMI). You are free to choose any Linux/Unix image, but for demonstration purposes let us pick Ubuntu 14.04 LTS, 64-bit.
Look for Ubuntu 14.04 LTS 64-bit in either the Quick Start or the Community AMIs tab, then click Select.

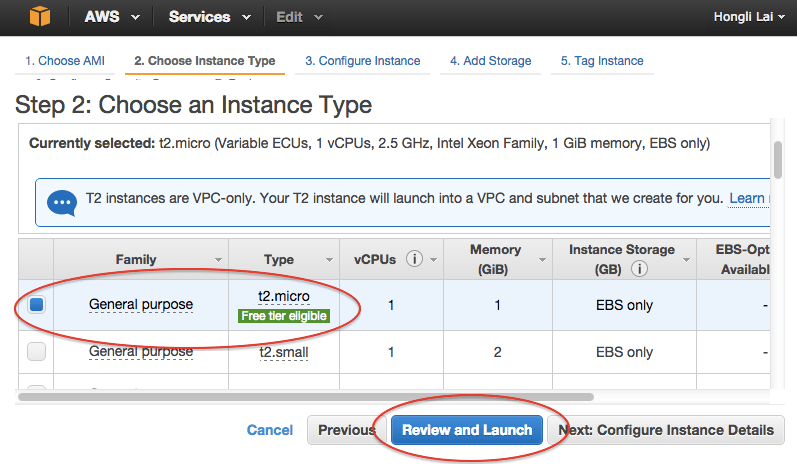
You are asked to choose an instance type, which determines the server's CPU and memory usage. Pick whatever you like, but make sure you have at least 1 GB of RAM, and make sure that you understand the cost implications of selecting bigger instances.
For demonstration purposes, let us pick t2.micro. Click Next: Configure Instance Details to continue.
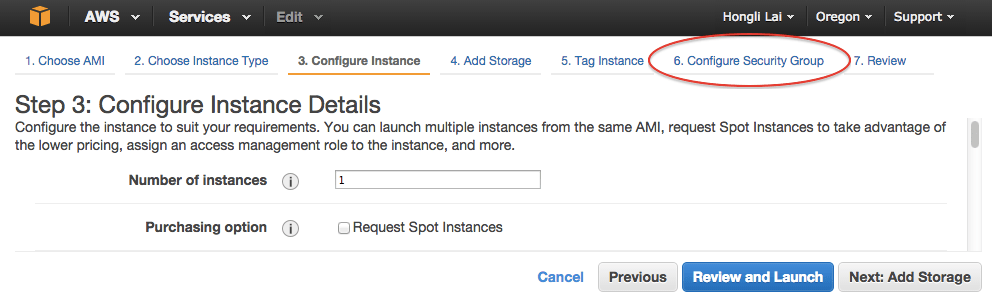
You don't have to do anything here. Skip to "Configure Security Group".
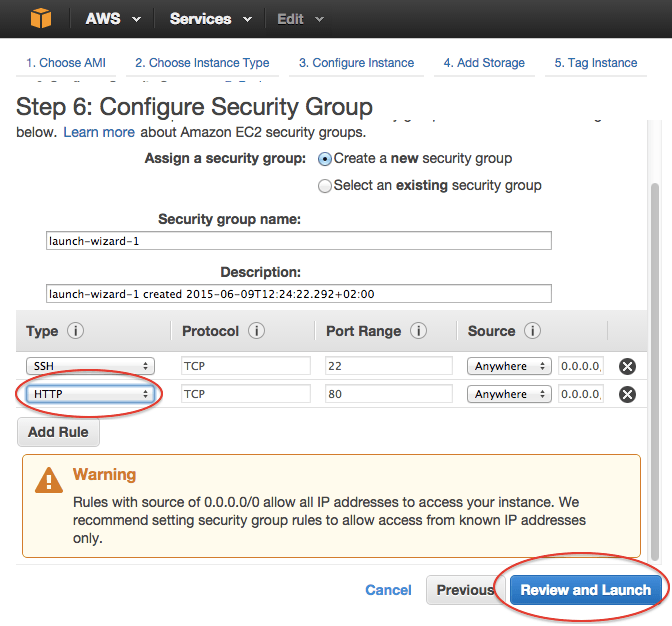
This screen is where you configure the server's firewall. You need to add security rules so that HTTP (and maybe HTTPS too, if your app uses HTTPS) is open. Click Add Rule to add a security rule. When done, click Review and Launch.
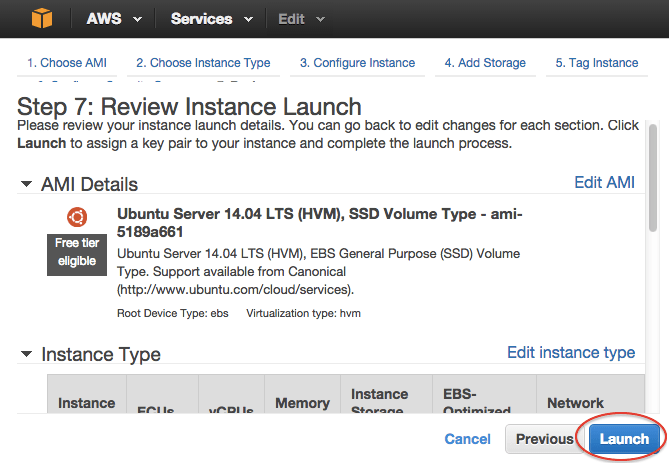
You are now asked to review your settings. If you believe everything is OK, then click Launch.
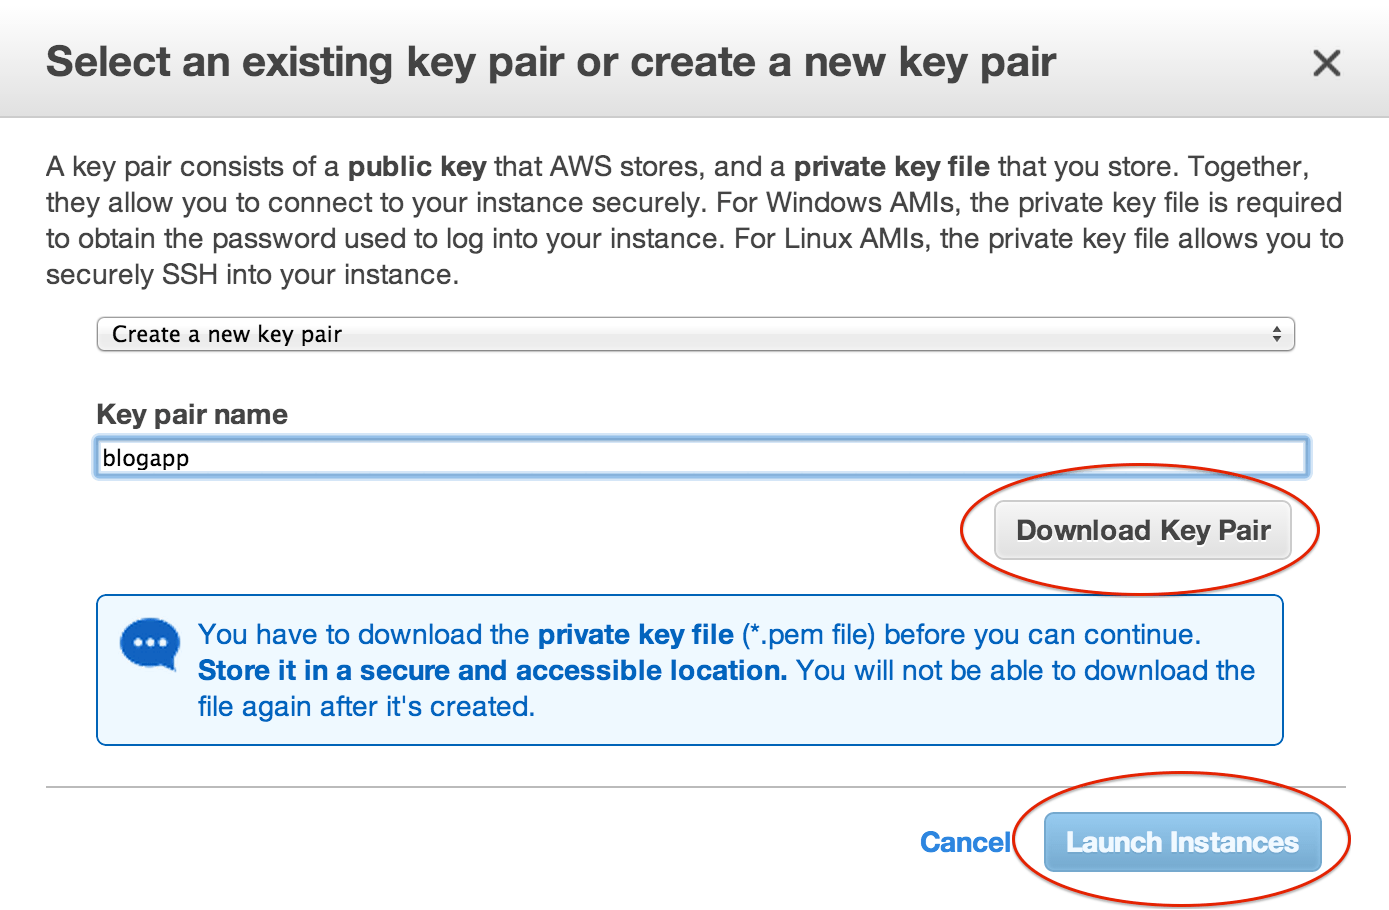
You are now asked to choose a key pair, or (if you don't have one yet) to create one.
If this is the first time you create a key pair in this EC2 region, give it whatever name you like, and make sure you download the key pair and store it safely.
When you are done, click Launch Instances.
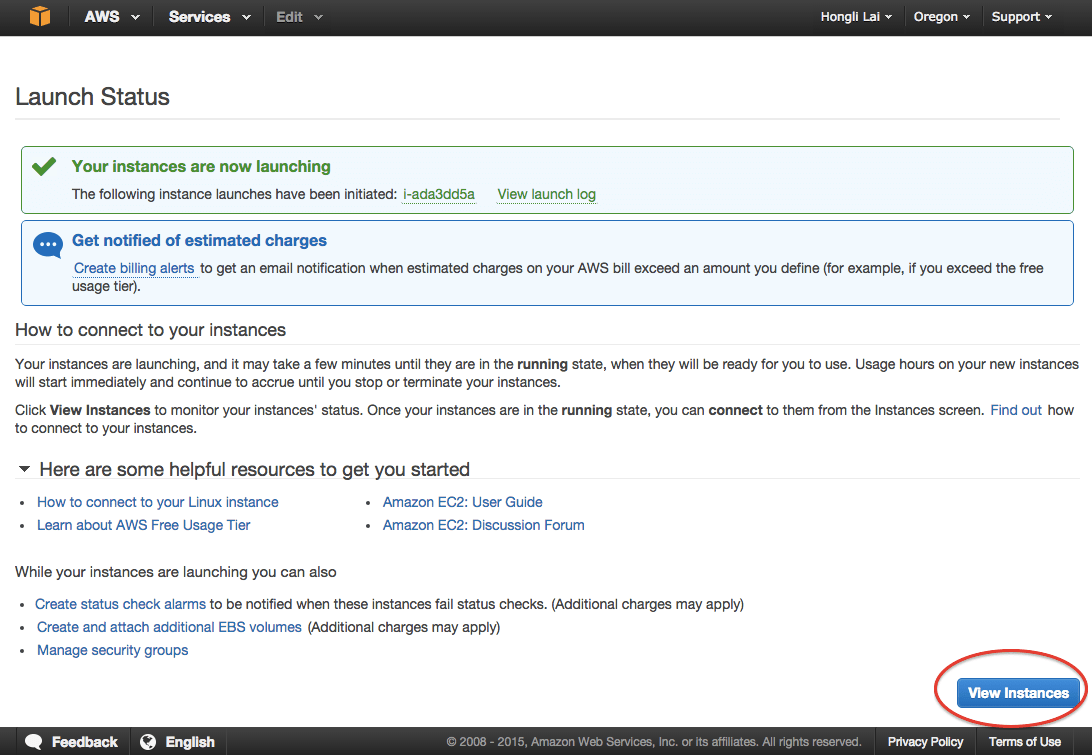
The AWS Management Console confirms that you have launched the instance. Click on View Instances to continue.
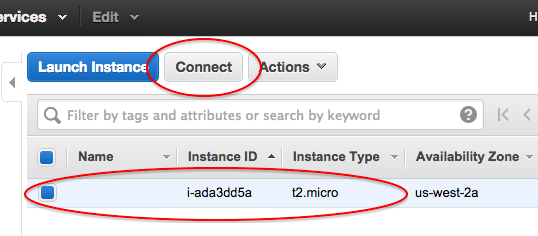
In the instances list, you should be able to see the server that you launched. The next step is to login to the server, so select your server and click Connect.
Note that the server may take a few minutes to boot, so the Connect button may not be available yet. Please wait a few minutes and try again.
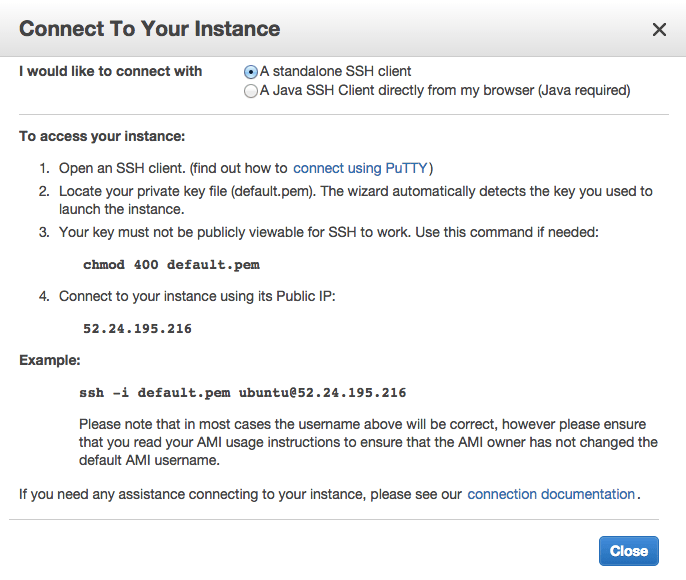
Follow the instructions on screen to login to your server through SSH.
Problems logging in?
Note that the SSH command may fail with a "Warning: unprotected private key file" error. This is because the permission of your private key file is too open. In that case, you can fix it by restricting the permissions on the key file:
$ chmod 600 ~/Downloads/yourkey.pem
Depending on which AMI you picked, you may also get a "permission denied" error. This is because the connection instructions on some AMIs are wrong. Some AMIs disallow login as "root" and instead want you to login with another username, but didn't edit their connection instructions to tell you that. So if you find that you can't login, try logging in with the username "admin", "ec2-user" or "ubuntu".
After following the instructions on the Connect screen, you should be dropped into a shell prompt on your server.
$ ssh -i default.pem ubuntu@52.24.195.216
The authenticity of host '52.24.195.216 (52.24.195.216)' can't be established.
RSA key fingerprint is 2d:d3:68:ca:82:9a:95:b9:34:4c:23:8d:3e:05:95:fe.
Are you sure you want to continue connecting (yes/no)? yes
Warning: Permanently added '52.24.195.216' (RSA) to the list of known hosts.
Welcome to Ubuntu 14.04.2 LTS (GNU/Linux 3.13.0-48-generic x86_64)

ubuntu@ip-172-31-45-45:~$
Next step
Congratulations, you have launched a server on Amazon Web Services and successfully logged in to the server!
Continue: Install Python »